Dec 25, 2011

Dec 21, 2011

Free Intuitive Heart eCourse by Lauren Luquin

Have you checked out this beautiful ecourse yet?


Lauren, beautiful soul that she is, decided to offer it for free!

You can read her lyrical, eloquent description of the course by clicking the image above.
Participants decide their own level of participation, no pressure or expectations.
:-)
That's perfect for me - I'm in hibernation mode right now, moving slowly and being cautious about commitments.

Lauren notes:
"*all Intuitive Heart members will get 11% off everything in my Etsy shop,
VisionWise - Earth Livity 1111, for the duration of the course*"

Sep 30, 2011

Painting In Progress 1

I've been painting a lot more recently since I tackled (part of) the mess in my studio.
I'm so excited to have my health returned to a level where I can use acrylic paints and glue again! I am returning to my first love of using texture in painting.

Here's a work in progress:


first, paint, then a layer of glue-water mix - half and half, that I used to attach repurposed biodegradable packing peanuts! They end up shrinking and collapsing in fun ways:

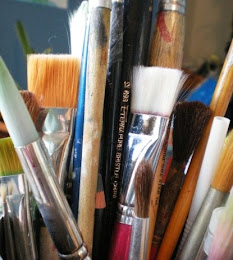
It's great to keep old, damaged brushed to use for glue since the glue wrecks a little more each time anyway. You can get more life from a glue brush by washing it with HOT water and soap as soon as possible after using. I use an old toothbrush with soap right on it to scrub the glue brush.


then I used the same glue-water mix to attach pieces of printed napkins. Once the glue dries, the part of the napkin that was white becomes transparent so that just the printing shows. Flowers and a butterfly:


I have since painted the packing peanuts a shimmery pearl white and now I feel stuck in that place of wanting to add more... but afraid of messing it up!
I have soooo many paintings in an unfinished state because of this.

If you'd like to see amazing examples of fearless layered paintings, check out Tara Leaver. She is awesome! And she takes the time and effort to share photos of each step of her panting journeys! Such dedication and patience! I have learned so much as an artist from following her blog.

Aug 9, 2011

Art Journal Bits 1

I felt like sharing a few bits from an art journal I'm working in lately - and loving.
I have so much fun making the backgrounds! It's been totally addictive for me and feels very therapeutic. I get into a meditative state while doing it that far surpasses anything I've gotten from traditional meditation. I'm so totally 'in the moment' that I'm unaware of time passing - sometimes hours.

juicy acrylic backgrounds scraped on with an old credit card

A huge amount of appreciation is beaming around the world from me to Hanna, whose great posts on altering books inspired me to get a great, spiral-bound Tai Chi manual for a few dollars second hand. Note that because my book is spiral-bound, I skipped the step of removing alternate pages.

another background using scraped acrylic, glued in napkins, marker

These backgrounds are so fast and easy - I love using the scraped-on paint method. Pencil crayon goes beautifully over top of acrylic paint.
The nice, thick pages that hold up well to acrylic paint and fun words to leave peeking through paint:


Thanks for the inspiration Hanna!


Aug 2, 2011

Feather Eraser Stamp (hand-carved)

All wrapped up and ready to send to a lovely woman who inspires me
(I forgot to take a photo of the stamp itself before wrapping it up... oops! :-)

Have you tried carving your own stamps from erasers yet?
It's so much fun! I love using them in art journals, on cards, envelopes, and other paper crafts.
T
hey also make wonderful, personal gifts.
Vinyl erasers work best and if you think you'll do this more than a few times, it's totally worth the money to buy a linoleum cutter (also called Lino cutter). I have the Speedball one shown in this photo.


It has a number of different tips to choose from and I find it very handy how they can all be stored in the handle. No chance of losing them. You can carve stamps using utility/exacto knives but a cutter like this is much safer and sooo much easier.
After only a few stamps, it will have paid for itself. I tried a few different kinds of vinyl erasers before settling on one I liked. This one cuts like butter. So smooth. And it's not scented - unlike most that I tried. Ick.

There are many tutorials online. Here are a few(note that you can also use carving blocks sold at art or printing stores. It's nice to begin with erasers because they are so cheap you may be less held back by fear of messing up!):
I saw this video of Geninne's only after I carved my feather stamp. Hers is amazing! (of course :)
Geninne in action

non-video tutorial part 1
non-video tutorial part 2

I confess that I don't have the patience to draw the design first and transfer it onto the eraser as shown in those tutorials. I draw directly on the stamp or just freehand it without drawing at all.

*Tips*

1. If you wear a cotton glove on the hand holding the stamp, you're less likely to get cut if you slip. This may seem unnecessary but it's totally worth it in my opinion :) Those blades are supr sharp.
2. If you will be carving curved lines, it's much easier to have the eraser on a small piece of paper that can slide around easily - then you can twist/turn the eraser itself as you go around corners rather than trying to move the cutter in a smooth, curved line.
3. Start gently. You can always cut deeper later but you can't add back parts you've removed!
4. When you are first getting the hang of this art, you can use all sides of the eraser to practice on. It will save money and be kinder to the environment.
5. If you create any kind of mixed media art, you can also save the shavings you carve off the eraser, mix them with glue or gel medium, and create very funky background textures for paintings etc.


Have fun!

Jul 28, 2011

Flower Within Mandala


I love this mandala - both the regular and the inverted versions make me smile :-)

created using sumopaint.com
source image (an envelope I decorated by hand):

Jul 6, 2011

Mosaic Mandala


I hope you are all having a lovely summer (and winter to those in the southern hemisphere).
The weather has been very weird here this year with temperatures going from cold to hot to cold again all in a single week but in the last few weeks, it's finally been hot more than not and the gardens are suddenly going wild!
I've been spending less time on the computer and more time in 'real life' :-)
My favourite thing about this season is the magic of flowers blooming. I get up each morning excited to go out into the yard and see what new blooms are waiting to light my face up with a smile or awaken my fingertips as I gently touch their petals.

What's your favourite thing about this season?


mandala created using sumopaint.com from source image:

Jun 11, 2011

Inspiration Cloud Mandala

Hmm... this blog seems to be mostly mandalas lately.
I have been doing a huge amount of art journalling/playing and painting.
These mandalas get shared most because they are so easy to post since I don't have to upload and edit images from my camera! And they're sooo much fun to make :-)


The source image for this mandala is a pen and marker drawing I did that I called an 'inspiration cloud' - doodles surrounding an empty place to write inspiring text:

May 19, 2011

Sunny Mandala

Rain has returned to southern Ontario and I am yearning for the sunshine that has made only brief appearances so far this spring!
This sunny mandala was created out of that yearning:


created using Sumopaint.com

Source image (St. John's Wort):

May 10, 2011

Sparkly Mandala


click on image if you'd like to see a larger version


created in Sumopaint.com from source image:

May 2, 2011

Serpent Mandalas


These mandalas are made using Sumopaint.com


The source image is of a beautiful garter snake I met a few summers ago:


Apr 30, 2011

Willow Tree Mandalas

I'm still having so much fun using the graphics programs I learned of recently.

Both of these mandalas had the same source image - weeping willow branches glowing in the sun against a blue sky.


I'm so excited at how they turned out!


Source image:

Apr 28, 2011

Springy Mandala


Thanks to Shala from the blog Don't Eat The Paste, I was just recently exposed to some great, free online graphics editing programs. She wrote excellent reviews of them and I encourage you to check out her post on the subject: Online Graphics Applications

Having lost my Photoshop Elements CD a few years ago, I've been so excited to play with these programs! They each have things I like best about them. This image was made in SumoPaint.
The original image is my watercolour painting Jubilant.
I love how this mandala turned out SO much! The colours felt springlike to me.
You can click on the image to see a larger version if you like. There are some really neat details. Every time I look at it I see different things in it :-)
Happy Spring!

Apr 16, 2011

A few photos

Having a camera (albeit crappy quality) on my cell phone has been making me more aware of my surroundings when I am walking about town, more present.

This old tower is in front of a modern office building where I have regular appointments and I enjoy it so much every time I see it! I love things that encourage me to look UP and notice the sky.

I really like the lines, angles and shadows.


This combination of 'fire dept' and ice made me smile:

Apr 7, 2011

In Love With Texture - Sculpture Painting

Now that I am starting to be able to use acrylic paints and glue again as my chemical sensitivities are improving, I am starting to get excited about returning to my first artistic love: TEXTURE building.
I am completely in love with building interesting texture and painting over it.
I use various things to build the texture, gluing on whatever calls to me in the moment.
Tissue paper, fabric, brown paper bags, found objects and dried organic objects like leaves, feathers and seed pods... the possibilities are endless when you have glue and can use it!

Here is a sculpture painting from many years ago that I had a lot of fun making:


And another angle with less glare:


A number of years ago I lived in Montreal which has an amazing system of alleys - awesome places for finding strange little bits of this and that simply crying out to be glued onto something and enjoyed :-)
Most of my 'strange stuff stash' has been packed away, awaiting the day I could use glue again. I think it's time to get it out!


Is there anything you've been saving to use 'one day' that you could dig into right now!?

Mar 6, 2011

Enjoying Silliness... Eerie cat's eyes

I hope to soon have photos of sewing projects to share with you.

Until then... how about some silliness!?

I get such a big kick out of what my partner's iPhone flash does to our cat's eyes in photos and I thought... well... maybe some of you may get a laugh out of it too!
So here are some crappy quality silly cat photos for you:

That pillow was placed vertically to prevent cats from sitting on it and covering it in fur...
... but Spooky was unfoiled in her pillow-sitting plans!


Ninja loves it when we decide to reorganise the pantry.


I just love how Ninja's two differently coloured eyes match the orange and blue fabrics on the chair!


Are there any silly things you like that make you laugh?

Feb 21, 2011

Thoughts on how joy and passion connect me to Divinity


Thoughts about divine, spirit, god/dess energy...

...a few days ago I went for short visit to the fabric store. It's far away and I don't drive so on the occasion that I get a ride there, it's an exciting thing! I walk in and feel like a 'kid in a candy store'.
It was a short visit, about 15 minutes, and I managed to find exactly what I was looking for... which is pretty neat considering I went in wanting "something satiny and slippery to make a scarf from... in colours I like" ... but didn't even have any colours in mind. ☺

I got 4 pieces of fabric and a bias tape maker and came back out to the truck with a huge grin on my face. I kept touching the fabrics on the way home and feeling so excited about working with them.

What does this have to do with divinity?

I have noticed that when I feel good, excited or passionate, about anything, I feel connected to the divinity within me and around me.
It doesn't matter what I'm feeling passionate about. It doesn't need to be something 'spiritual'. Last week we had a mild spell and I was on top of the world to be out on the deck, blowing bubbles. Yesterday I had great fun giggling with my partner over the antics and idiosyncrasies of our cats. Both of those got me connected to that divine spark within me, the spark that I believe is connected to the great, cosmic divine energy, that I believe we are all part of.

I have also noticed that when I feel down, depressed, sad or despairing, I feel disconnected from that spark. I know it's still there, but it feels like I'm wrapped up in layers of heavier emotions that come in between me and that spark.

I feel like the disconnection from divine is what makes me feel so down, so heavy... and yet at the same time, I feel that it is the very feeling down and heavy that disconnects me. So it's kind of confusing to know which comes first, or how it comes about.

The important thing in this, for me, is knowing that feeling joy, passion and love coincide with feeling connected to divine. It doesn't matter which comes first... just knowing that they happen together for me means that I can feel more connected by purposely doing things I love, doing things that excite me or inflame my passion.
I think I'd like to make a list of things that elicit love or joy in me.

A few that come to mind:
blowing bubbles
painting
rainbows of all kinds
talking to trees, plants and animals
sewing
dancing to a song I love
being in nature
doing or saying something that makes another person feel good
swimming in lakes
planning creative projects
gardening
singing to my cat (he loves it :)


What are some things on your joy list?
I'd love if you shared in the comments. It is so wonderful to read others' joys, loves (and I often get great inspiration!).
~☼~

Feb 20, 2011

Super Simply Sewn Satiny Scarf forThree Dollars

I adore all things shimmery, satiny, sparkly and metallic. I also love flowing clothing that moves when I do. At the same time, I'm a bit of a tomboy - the type who likes climbing trees, can't wear white without getting it dirty, washes all colours together in the laundry, and has zero tolerance for clothing that is uncomfortable. Fragile clothing, worn by me, invariably gets damaged. I choose jewelry based on how unlikely it is to get caught on things or banged up in the garden :-) When I see women with rings that stick up, I instantly think, "How do they handle that? It would bang into everything!"

I've been eying the many styles of scarves in stores lately and most of them are either made from material that feels scratchy or are so fragile they would fall apart in the wash (I also have low tolerance for clothing that can't just be tossed in the washer with everything else :).
The scarves out now are also pricey! It feels wrong to me to spend $15-20 on a tiny piece of fabric that would cost about $1 to buy.

So I decided to buy fabric and try making my own! My sewing skills are basic and I don't have patience with patterns and pinning so my creations sometimes work... and sometimes don't.

Thankfully this experiment went pretty well.

This lovely fabric shimmers in the sun and has a beautiful, satiny feel to it... yet it's made from polyester and can be tossed in the washer and dryer - yay!

widthwise seam, inside

I didn't take a photo of the first step which was to cut half a meter of fabric in half, lengthwise and sew two ends together widthwise. You can see those ends sewn together vertically in the photo above.

lengthwise seam inside

Then I had one long, narrow piece of fabric about 10 inches wide. I folded it in half with the right sides together and sewed the 2 'wrong' sides together. I didn't bother pinning, just matched up the sides as I went along with a simple straight stitch. The fabric was not cut evenly at the store so it's not even but it doesn't show when it's being worn.

widthwise seam, rightside out

That photo above is how the outside seam looks where the 2 long pieces were joined widthwise.

lengthwise seam rightside out, unironed

When I was done sewing lengthwise, I had a long tube with both ends open. At that point, if you wanted closed ends, you would sew one end closed all the way and the other end closed except for a few inches (then pull the tube rightside out through the small opening and handsew it closed). I wanted my ends left open so at this point I simply turned the long tube rightside out... and I was done! I could have ironed it so that it will lay flat but I really like the body and fullness it has and I don't want to flatten it one bit :-)

big, long tube scarf, outside


The ends didn't match up perfectly and I'm not sure what I'm going to do about that yet. I'm pretty laid back so I may just leave it :)


Total cost for this project:
only
$3
(for the fabric)


*I've never tried to describe a sewing project in text before so if you have any questions or would like me to clarify something, please do not hesitate to let me know in the comments :)

Related Posts Plugin for WordPress, Blogger...

Followers