Showing posts with label repurposing. Show all posts

Sep 30, 2011

Painting In Progress 1

I've been painting a lot more recently since I tackled (part of) the mess in my studio.
I'm so excited to have my health returned to a level where I can use acrylic paints and glue again! I am returning to my first love of using texture in painting.

Here's a work in progress:


first, paint, then a layer of glue-water mix - half and half, that I used to attach repurposed biodegradable packing peanuts! They end up shrinking and collapsing in fun ways:

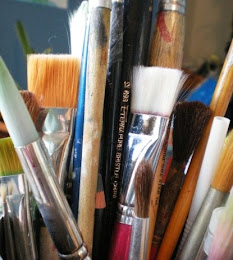
It's great to keep old, damaged brushed to use for glue since the glue wrecks a little more each time anyway. You can get more life from a glue brush by washing it with HOT water and soap as soon as possible after using. I use an old toothbrush with soap right on it to scrub the glue brush.


then I used the same glue-water mix to attach pieces of printed napkins. Once the glue dries, the part of the napkin that was white becomes transparent so that just the printing shows. Flowers and a butterfly:


I have since painted the packing peanuts a shimmery pearl white and now I feel stuck in that place of wanting to add more... but afraid of messing it up!
I have soooo many paintings in an unfinished state because of this.

If you'd like to see amazing examples of fearless layered paintings, check out Tara Leaver. She is awesome! And she takes the time and effort to share photos of each step of her panting journeys! Such dedication and patience! I have learned so much as an artist from following her blog.

Nov 22, 2010

I Love Paper Weaving!


I spent almost the entire weekend with the computer turned off and was impressed with (but not surprised by) just how much more time it felt like I had.


I recently read about using a paper shredder to make paper strips for crafts instead of having to cut them all by hand... what an awesome thing!  So many types of paper (please see disclaimer at bottom of post) can be fodder for the shredder - magazine pages, the cool patterns on the inside of security envelopes, sturdier wrapping paper, paper bags, drawings, paintings, colouring and art journal pages you don't need any more, coloured envelopes you receive in the mail, construction paper, sheet music (which you can photocopy if you want to keep the original - thank you S. for that awesome idea and for sending me sheet music in the mail! :)


The strips of paper can be used for many different crafts but my favourite is paper weaving.  If you have a paper shredder and think you may like paper weaving, I encourage you to try it out!
I tried coating them in glue afterward and the one that used about 50% construction paper did very well and stayed flat.  The one made entirely with thinner paper warped but I will try putting it under some heavy books to see if it will flatten out.


Here are some photos:
Christmas-y colours.  I will likely cut this piece up to decorate cards or make ornaments with.  This is the piece that had construction paper and survived the glue very well.

Music weaving start.


Music weaving finished.

I found it a bit boring all white and black and decided to try stamping on top of it... not very happy with the results but I find it interesting enough that I will try this method again :-)

An abstract watercolour painting on paper was the source for this weaving.


If you experiment with paper weaving and post online, I'd love if you'd include a link in the comments section!  I love seeing other people's experiments :-)

*disclaimer and warning*
I have no idea if any of the paper suggestions could jam your paper shredder... please proceed with caution! :-)  With the shredder I used, the super thin, flexible papers ended up shredding in a slight curve and were not straight-edged.

Nov 19, 2010

BlueBird of Happiness - detail from art journal page

This small piece is one of my favourite parts from a larger art journal spread that I've been puttering with over the months.


You can click on the image to see a larger version (hopefully it works - this blogger feature has been causing me some problems lately).

I find art journalling so healing and therapeutic.  I often begin by laying down a background of words or images that express a difficult emotion I am processing, then when I have kind of 'gotten it out' I continue adding layers and transform the 'negative' into a viewpoint I'd like to have that is more positive.  It's rare that I art journal without realising something very important about myself.

The nice thing is that when I go back months later and look at a page, I usually can't recall the angst that began the page - I only recall the positive message/learning that came out of it!

Tip: the lid from an old toothpaste tube can be repurposed into a fun stamp that makes two circle sizes depending on which end you use.  I like the frilly edges it makes.  The border around the bird's 'nest' is made with a hand carved eraser stamp.

May 18, 2010

Grunge Star Rubbed Impression Page with Ink Pads and Cereal Box Stars

Did you save the shapes you cut out from the cereal box template project?
If not, you may end up cutting out shapes just to make fun pages like this one!


How To:

Lay a piece of thinner paper (ie printer paper) on a totally flat surface.

Take a stamp ink pad and lightly rub it and drag it around the page until you like how it looks.  *If you have an almost dried out ink pad this will be very easy.
All of mine are newer and the trick to prevent big blotches is to have the pressure so light there's almost none... and keep it moving!*

Repeat with as many colours as you like - preferably working from lighter to darker if you care about contaminating the lighter pads with darker colours.

When you like how it looks, take your cereal box shapes and lie them under the paper.


Take an ink pad of a darker colour (or the same as the most dark you have used so far) and rub over top of the paper in the area of the edges of the shapes until you like how it looks!

So simple and easy!

In the basic image above I just used 2 colours and only used the cereal box shapes on the final layer but you can play around to make this much more saturated, with shapes on various layers like this:


It only takes minutes to do but be warned - it's so much fun it can be addictive!
Now I just need a project to use these pages... which I will likely have way too many of soon :-)

If you do something like this and post on your blog or site, please let me know in the comments!  I'd love to share the links for readers.

May 14, 2010

How To Make A Drawing Template From A Cereal Box

Some people can draw crisp, clean shapes freehand.
Not I.
:-)

If I want a reliable, nicely drawn shape or line, I use a drawing template or ruler.
These are normally made from stiff plastic and are very durable.
At the moment, I have ones for circles, ovals and curvy lines.
I have been wanting ones for stars but am on a budget and felt like I couldn't justify the cost.
Instead, I decided to try making one from an old cereal box!
It won't be quite as durable as a plastic one but when it becomes unusable, I can simply recycle it and make another.

I used a cereal box but you could use any thick, firm 'boxboard' such as a facial tissue box, cookie box etc.  It needs to be thicker than cardstock paper.  I don't think this would work well with corrugated cardboard - it may be too flexible.

If you can draw well, you can draw shapes directly on the cereal box.
Or you can do as I did and print out shapes to use (many free templates can be found by searching Google with words like "free printable templates").
If printing, cut loosely around the shapes, leaving some of the printer paper around the shape - this will help you know where you have cut because the printer paper will be cut away.
In the picture below, the star on the right has already been cut out though I haven't popped out the piece yet.

Attach the shapes to the cereal box with a dab of gluestick.  This makes sure the paper doesn't slip while you are cutting.  You don't need to glue every bit of it though you can if you want.
Make sure you leave space between the shape and the edge of the cereal box - this will help the template be stronger.


Using a sharp exacto or utility knife, carefully cut along the outline of the shape.
I know you know this but I have to say, "Please be careful not to cut yourself!  Keep fingers, thumbs and other body parts out of the path of the knife" ;-)
I use a metal ruler as a guide - the cork that is normally on the back of these rulers has been removed so that it lies perfectly flat to the paper.
Cut from the outside edges of the shape towards the centre - that way you don't have to worry if you cut a bit too far - the extra cut will be into the centre piece that will be discarded at the end.
When you are done cutting around the shape, gently press from the bottom up to loosen the centre piece.
*If there are bits of the corner still attached, carefully cut them with an exacto knife.  Pop out the shape, trim any rough bits, trim the edges off the cereal box, recycle the scraps (or use them for one of the ideas mentioned below) and you're done!


In this second picture you can see the utility knife I switched to when I realised my exacto wasn't sharp enough to cut easily.  You can also see a 15-point star I drew using the small star template.
I still have room on this template to ad a few small stars.

*This template could be made stronger by gluing 2 layers of cereal box together.*

If you didn't cut too far into the centre of the shapes, you can use them for other crafts!

Here's one fun way I've used them so far:
Grunge Star Rubbed Impression Page

Other Possibilities: 
  • collage on one side of the shapes and glue into an art journal page
  • collage both sides and hang from a string somewhere just for fun
  • cover both sides in some kind of pretty handmade or cardstock paper, decorate with sequins, beads, jewels etc... hang on a string
  • glue onto canvas before painting to add depth/dimension
Do you have any other ideas for using the cut-out shape?
Tips to make this template process better/different?
Did you try this and post on your blog?
Please share in the comments area :-)

Apr 9, 2010

Magic Tags and Love Collage

Made from scraps of failed paintings and filled with words I love, interspersed with sparkly tinsel, these 'magic tags' all in a row make my art room a happier place:


Update: I finally came across the photo that inspired me to do these (although the method is a bit different, the core idea was from here).  Like much of my favourite inspiration, this came from Daisy Yellow (thank again Tammy!).

While sorting boxes, I found a collage done a few years ago.
It is so simple yet when I got to this point, I loved how it looked and didn't want to clutter it up!  The wonderful image in the centre is by an artist I love - Susan Seddon Boulet.

Feb 16, 2010

Repurposing Failed Projects


Some watercolour experiments don't turn out well so I use the paper as background or scraps for other projects.  All of the words shown in the lefthand photo will become fun inspiration tags like the Magic one shown above.
Update: I finally came across the photo that inspired me to do these (although the method is a bit different, the core idea was from here).  Like much of my favourite inspiration, this came from Daisy Yellow (thank again Tammy!).


I made a strange little decoration for one of my plants including this lovely Blue Jay feather my mom sent me in a Valentine's Day card - thanks mom!


Related Posts Plugin for WordPress, Blogger...

Followers