 All wrapped up and ready to send to a lovely woman who inspires me
(I forgot to take a photo of the stamp itself before wrapping it up... oops! :-)
It's so much fun! I love using them in art journals, on cards, envelopes, and other paper crafts.
They also make wonderful, personal gifts.
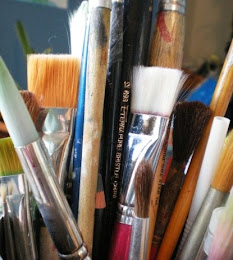
Vinyl erasers work best and if you think you'll do this more than a few times, it's totally worth the money to buy a linoleum cutter (also called Lino cutter). I have the Speedball one shown in this photo.

It has a number of different tips to choose from and I find it very handy how they can all be stored in the handle. No chance of losing them. You can carve stamps using utility/exacto knives but a cutter like this is much safer and sooo much easier.
After only a few stamps, it will have paid for itself. I tried a few different kinds of vinyl erasers before settling on one I liked. This one cuts like butter. So smooth. And it's not scented - unlike most that I tried. Ick.
There are many tutorials online. Here are a few(note that you can also use carving blocks sold at art or printing stores. It's nice to begin with erasers because they are so cheap you may be less held back by fear of messing up!):
I saw this video of Geninne's only after I carved my feather stamp. Hers is amazing! (of course :)
Geninne in action
non-video tutorial part 1
non-video tutorial part 2
I confess that I don't have the patience to draw the design first and transfer it onto the eraser as shown in those tutorials. I draw directly on the stamp or just freehand it without drawing at all.
*Tips*
1. If you wear a cotton glove on the hand holding the stamp, you're less likely to get cut if you slip. This may seem unnecessary but it's totally worth it in my opinion :) Those blades are supr sharp.
2. If you will be carving curved lines, it's much easier to have the eraser on a small piece of paper that can slide around easily - then you can twist/turn the eraser itself as you go around corners rather than trying to move the cutter in a smooth, curved line.
3. Start gently. You can always cut deeper later but you can't add back parts you've removed!
4. When you are first getting the hang of this art, you can use all sides of the eraser to practice on. It will save money and be kinder to the environment.
5. If you create any kind of mixed media art, you can also save the shavings you carve off the eraser, mix them with glue or gel medium, and create very funky background textures for paintings etc.
Have fun!


Very interesting idea, thanks for sharing sister.
ReplyDeleteIn Lak' ech, live in truth prosper in love...
Thanks for sharing how to do the stamp carving. Your leaf is absolutely stunning!
ReplyDeleteyou are both most welcome :) and thank you for your kind words!
ReplyDeleteWhat a great little stamp! I remember doing this when I was a kid with a picket knife and erasers, I totally loved it.
ReplyDeleteThe feather stamp is lovely! You have one lucky friend. I haven't made one in many years...but I just might have to try it again! Thanks for sharing!
ReplyDeleteThanks for commenting B and Kelly :-)
ReplyDeleteIf either of you make one I'd love to see it!
Love the feather. I found it breathtakingly beautiful!
ReplyDeletethank you Katie!
ReplyDeleteYour stamps look great.
ReplyDeleteI've tried making my own before, I like how simple it can be
Thanks Lisa!
ReplyDeleteHey... I was just showing my mom your miniatures and she was blown away (she makes miniature pottery)... and I was blown away all over again because I hadn't looked for a few months :)
You have SO much talent!